Learn how to install Shadowsocks server on any Amazon EC2 Ubuntu instance (Free Tier) easily.
Update 1: I recommend SocketPro, a dirt cheap option ($2.41/mo annual) if you prefer to rely on a service provider. Their services are top-notch and I’ve been using it for almost two years alongside my DIY servers. Click here to read my review.
Update 2: Thanks Janosch for pointing out the error in the installation script. I’ve updated it now.

Warning: Although this guide is intended to be 100% n00b friendly, there are chances you may face minor issues or errors during setup. Be prepared. Write to mail at m1q.net if you want me set it up for you for a small fee.
Prerequisites:
- Access to AWS console. (Requires one-time credit/debit card verification)
- Read more about EC2 Free Tier.
- SSH client.
- Patience.
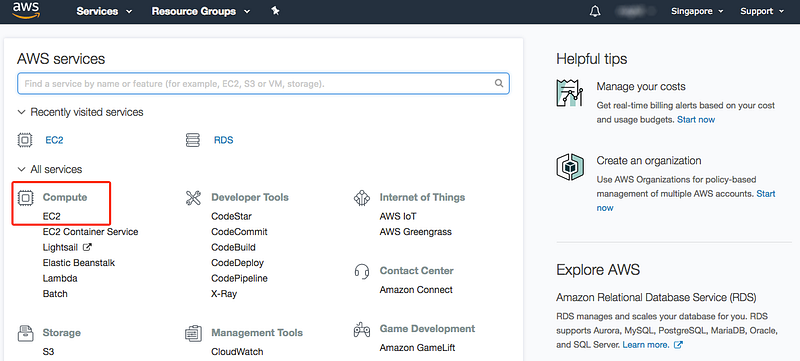
Sign in to the AWS Console & Create an EC2 Instance
AWS may take you to the US region by default. It’s up to you to choose the location.
Select EC2 in the Compute Section
Select the Asian region (Tokyo or Singapore recommended) if you’re from China.
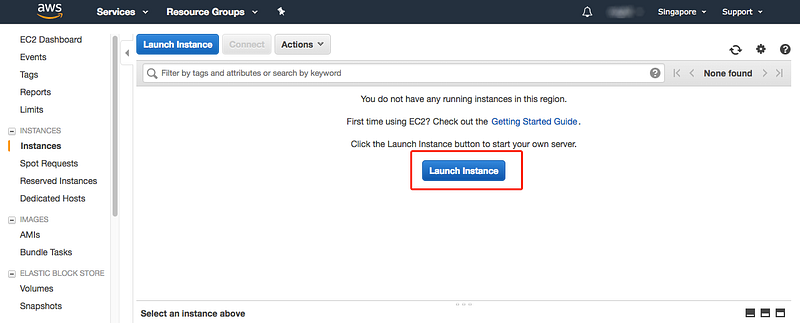
Click Launch Instance
Go on and read their Getting Started Guide if you’ve got enough time.
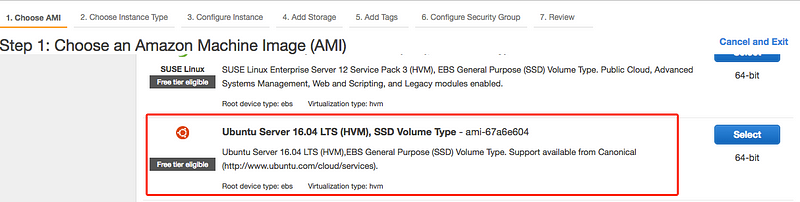
Select The Ubuntu Server 16.04 LTS
Ubuntu Server 16.04 LTS is Free Tier Eligible, and that’s what we’re going to use for this guide as well. Click Select and proceed to the next step.
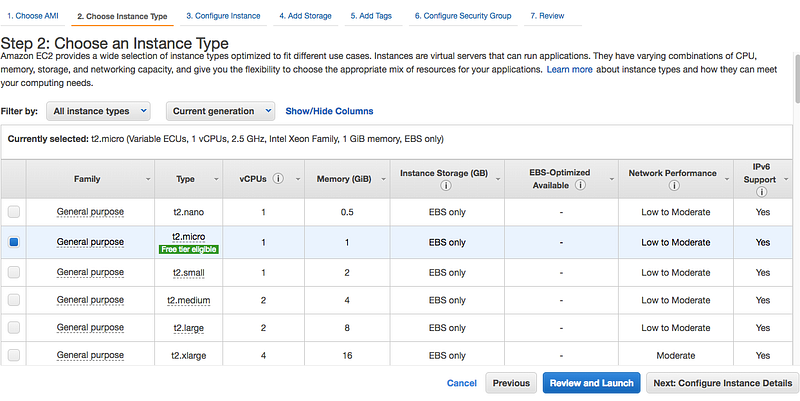
Choose the Instance Type
Look for the t2.micro which is Free Tier eligible. Select it and click Review and Launch.
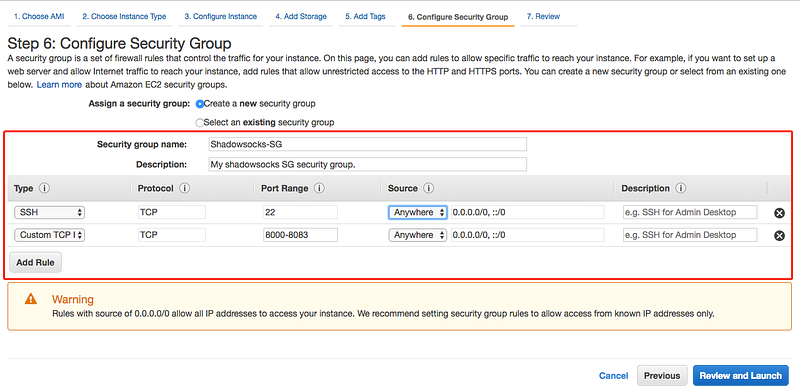
Configure Security Group
Open the TCP ports you’re going to use for ShadowsocksR. I’ve set Port Range from 8000–8083 for this guide. You can limit the source according to your preference. Click Review and Launch when you’re ready.
Create a New Key Pair
Create, download, and save keypairname.pem file in a safe place.

Congrats on the 60% progress. Now learn how to use PEM key on Mac before jumping to the big steps. Windows users, you have to convert PEM file to PPK. Please read it and come back to this article.
macOS: Copy The AWS Generated PEM File to a Safe Location
Here’s how to copy keypairname.pem to /Users/usrname/.ssh/ (hidden directory)
- Copy the keypairname.pem file.
- Open Finder, use the shortcut “Shift + Command + G” and type in /Users/usrname/.ssh/
- Paste the keypairname.pem file.
macOS: chmod 400 the PEM file
We have to set the right permissions for PEM file. Use the chmod command to make sure that your private key file isn’t publicly viewable. For example, if the name of your private key file is keypairname.pem, use the following command:
$ chmod 400 /Users/username/.ssh/keypairname.pemAlright, it’s about time fellas! Let’s dive into the Terminal/Putty.
macOS: Uncheck this Sucker in Terminal Preferences (Recommended)
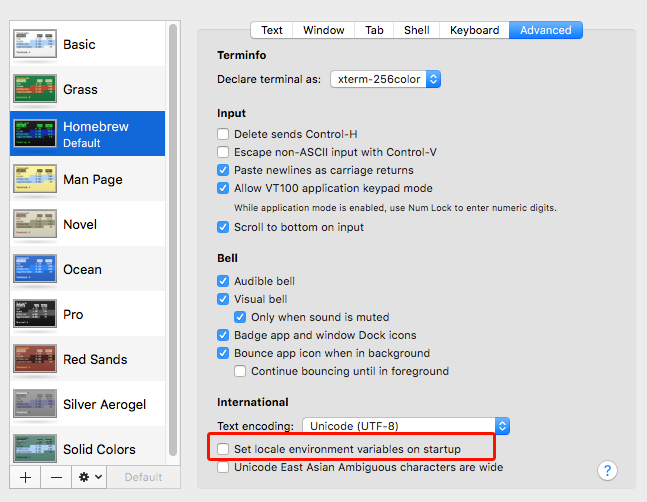
There are chances some users may get locale errors, it’s a best practice to uncheck this from Terminal Preferences.
Connecting to the EC2 Instance
Let’s connect to your instance from Putty or Terminal:
macOS, via Terminal:
$ ssh -i /Users/username/.ssh/keypairname.pem [email protected]!! Check your public IP from the corresponding AWS EC2 webpage.
Windows via Putty:
Load your PPK and connect to the server as the Ubuntu user
Switch User in EC2 instance
Once you’re inside the EC2 instance. Switch to the root user:
$ sudo suRun The ShadowsocksR Auto-Installer
Once you have logged in to the server, run the following command to update the packages:
apt-get updateNow, run the following commands to install Shadowsocks:
sudo apt install shadowsocks-libevAfter finishing up the steps above, we must create a .json file (config file) for Shadowsocks. In order to do this, fire up Vi editor or open your text editor and create a new file. Add these data to the file:
{
"server":"your_droplet's_IP_address",
"server_port":8000,
"local_port":1080,
"password":"your_password",
"timeout":600,
"method":"aes-256-cfb"
}
You can choose any encryption method from here.
Save the file as /etc/shadowsocks-libev/config.json.
Now restart your Shadowsocks service. Run the following command to do so:
sudo systemctl restart shadowsocks-libev
sudo systemctl status shadowsocks-libev
Now you’re ready to roll.
Shadowsocks Clients:
Check out the clients for different platforms listed on Shadowsock’s official website.
That’s it, congrats on the 100% progress.
Write to me you want me to set it up for a small fee.
Join The Mailing List
Get tips on WordPress optimization, website hosting, and VPN/proxy optimization guides for expats in China. Subscribe via email. MailChimp automates the mailing list. The mailer won’t spam your inbox. You can unsubscribe at any time.